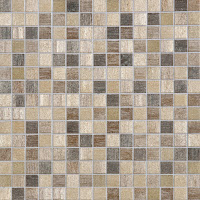
Tuesday, November 22, 2016

Your Local Queen Creek Handyman Shows You How to Create a Striking and Unique Backsplash Part 2 Grouting.


Local Queen Creek handyman shares best tips and practices for creating a beautiful backsplash.

Use My Guy here to finish up the discussion on creating a tile back-splash for your kitchen or bathroom.  This time we talk grout, what you will need to do it correctly and how to do it correctly.  Grouting properly begins by following the grout manufacturer’s specifications on the water to grout ratio.  You can also use pre-mixed grout which is more expensive but will be more consistent.

So here’s what you will need:  Plastic sheeting, masking or painters tape, grout (pre-mixed or dry), two clean buckets, putty knife, sponge, soft cloths, grout sealer and caulk. 

Before you begin, take the plastic sheeting and spread it over your countertop sealing it with the tape.  Once this is complete mix your grout to the specifications on the package in one of the clean buckets with the putty knife.  When it is ready it should have the consistency of creamy peanut butter.  Next take the grout float and dip it into the grout making sure that there is plenty on it.  Take the float and run it down over the tile at a 45 degree angle making sure to go in a diagonal direction.  Do only small areas at a time so that the grout doesn’t dry out.


Once the grout has cured for 10 – 15 minutes use a damp sponge to clean the excess grout off of the tiles.  Make sure to clean the sponge often.  You may need to go over the grout 3 or 4 times to get most of it off.  Be sure to be gentle, as you don’t want to disturb the grout lines.  Now just let the grout cure for 24 hours.  Once this is done you can buff the tile with a dry cloth to get off any remaining grout.

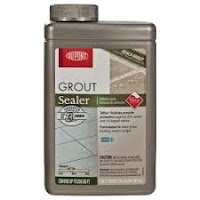
Now it is time to seal the grout.  Spray the grout with a sealer and wipe it in gently with a soft cloth.  Next caulk the lines next to the windows, any lines that meet wall to wall and along the bottom of the counter.  Make sure to use a latex caulk.  This will ensure that no water leaks behind the tile.

Now your back-splash is finished and it’s time to get cooking.  Be as messy as you want because now you have a back-splash and cleaning up will be easy.

Now although creating a back-splash can be a fun weekend project for some, for others it can be an exhausting way to spend your weekend after working all week.  If this is you then give Use My Guy Services a call.  We are a family owned and operated handyman company that has been in business in the valley for 5 years now.  We have an A+ on the Better Business Bureau, we have dozens of 5 star ratings on yelp and Face Book and we just won the Super Service Award from Angie’s List.  We can take care of all of your handyman needs from tiling a backsplash to plumbing and electrical repairs, installing new doors, frames and even drywall repairs.  Call us today at (602) 316-9187 to speak with one of our friendly and courteous office assistants to schedule an estimate or an appointment.  Or check us out online on our Face Book page or on our website usemyguyservices.com.
Thanks for reading
Use My Guy Services Your Local Queen Creek Handyman.


Tuesday, November 1, 2016

Local Queen Creek Handyman Shows You How to Create a Striking and Unique Backsplash For Your Kitchen.

Local Queen Creek Handyman Here To Show You How to Create a Striking and Unique Backsplash for Your Kitchen or Bathroom.


Mosaic Tiles
Hi readers!  Use My Guy Services your local Queen Creek Handyman here.  This week I am going to give you instructions on how to create a beautiful back splash for your kitchen, bathroom or anywhere else you want to put it.   To begin with let’s look at what types of tile are best for your situation.  If you are a beginner at laying tile then it is a good idea to use small tiles that are mosaic style.  These are small tiles that are connected by a fine mesh on the back usually in the shape of a square.  The reason that this is an ideal starter tile is because it is easier to cut the tiles to size.  Instead of needing a tile saw to cut larger tiles into shapes you can use a box cutter to fit the mosaic to the trim areas.  Mosaic tiles also allow you to create more unique patterns than using single tiles.  
Large Single Tile
Now there are some downsides to using mosaic tile for a back splash.  The biggest downside to using mosaic tile is that it is more difficult to clean than larger tiles.  The other downside to mosaic tiles is that you cannot control the size of the grout lines.  Smaller grout lines are easier to keep clean than wider ones although wider grout lines add more character to the tiled area.  Now if you have previous experience with tile and you own a tile saw then you can consider using larger tiles.  Larger tiles are easier to clean than the mosaic tiles.  You can also make the grout lines as big or as small as you like.  The best way to lay tiles for a back splash is to have very thin grout lines.  This will decrease the amount of space there is for bacteria to accumulate.
So now that you have decided what type of tile you are going to use it is time to collect the items that you need to successfully and efficiently lay the tile.  You will need:
1)      Your choice of mosaic tiles 
2)      A box cutter. 
3)      Mastic or thinset mortar.
4)      Tile spacers.
5)      A notched trowel. 
6)      Tile cutter or tile nipper.
All of these items are available at your local hardware store so don’t forget to buy local to support your economy.
Once you have these items you are ready to do a dry run.  Lay your tiles on the counter below the wall you are tiling.  You want to lay your pattern out before you begin, to ensure that it is consistent.
Now you are ready to begin.
Take tile spacers and put them underneath the area you are about to tile.  The reason it is important to do this is to help maintain an even level of height throughout you back splash.
Apply a layer of thinset mortar over your first area         (make sure that you only apply enough to tile in 15 minutes or it will begin to harden and you will have to restart that area by scraping of the dried mortar).  Then drag your notched trowel at a 45 degree angle through the thinset mortar to make uniform ridges.  This will help the tile to stick securely to the wall.
Now you can take the mosaic tile square and press it firmly and with even pressure on the area you have just mortared.  Make sure that you use even pressure or your tile will look uneven and be more difficult to clean.  
Repeat this process until you have covered the desired area that you would like to tile.  Using a mosaic tile that is a uniform shape like small squares will help beginners fit tile in the corners and edges of the back splash.  You will need to let your tile cure for 24 hours.
Now you are finished with part one of creating your own great back splash.  The next step will be to grout and seal your tile but you will have to tune in next time for that.  Now although creating a back splash can be a fun weekend project for some, for others it can be

an exhausting way to spend your weekend after working all week.

If this is you then give Use My Guy Services a call.  We are a family owned and operated handyman company that has been in business in the valley for 5 years now.  We have an A+ on the Better Business Bureau, we have dozens of 5 star ratings on yelp and Face Book and we just won the Super Service Award from Angie’s List.  We can take care of all of your handyman needs from tiling a back splash to plumbing and electrical repairs, installing new doors, frames and even drywall repairs.  Call us today at (602) 316-9187 to speak with one of our friendly and courteous office assistants to schedule an estimate or an appointment.  Or check us out online on our Face Book page or on our website usemyguyservices.com
Thanks for reading
Use My Guy Services Your Local Queen Creek Handyman.


Tuesday, September 27, 2016

Want To Put Some Pep In Your Bathroom?! San Tan Valley Handyman Shows You How!

San Tan Valley Handyman Shows You Easy Inexpensive Ways To Update Your Bathroom!


Hi Readers.
Use My Guy your San Tan valley handyman here with some ideas to help bring your bathroom into the 21st century.  Does your bathroom look like the bathroom in the house that your grandma has lived in for 50 years?  Is the counter the color of wax?  Do the walls have floral print wall-paper that looks like some-one copied a Georgia o-Keefe painting 100 times and glued it all over the walls?  Today I discuss 5 ways to revitalize your bathroom that will not break the bank and are reasonably easy to do.
1)       Change out that old cabinet counter top sink with a pedestal sink.  Pedestal sinks not only save space but they are also in-expensive and come in thousands of styles.    
Now adding a pedestal sink may appear to be difficult but if you follow these guidelines then it should be a breeze.

Make sure to measure the sinks distance from the wall.  This is only necessary if your sink bolts into the ground and your sink should come with detailed instruction on how to do this. However the basic rule is to turn the basin up-side down and measure from the part of the recess that the basin sits on the pedestal that is farthest from the wall to the edge of the basin that will be touching the wall.

Next mark the holes that the bolts will be going through to secure the sink to the wall.

Make sure that you install the faucet that you are going to use before you install the sink because you will have to pull it away from the wall to do so.  This will save you quite a bit of time so don’t forget!!!
2)       Hang new towel racks and a toilet paper dispenser.  Choose a set that complements the existing         faucet and cabinet knobs.
3)      Hang a new mirror.  If your bathroom is particularly small then it is a good idea to choose a large mirror.  It will reflect the light and make the space feel much larger.  Just make sure that it fits with the existing light fixtures which brings us to the next tip.
4)      Install new light fixtures.  This feature can really change your bathroom from that 80s hair trap into a modern and pleasant space.  I know that electricity can be scary but if you follow a few simple rules than you will maintain an UN electrocuted body. 
Non contact voltage tester
First of all go to Home Depot or your local hardware store and spend fifteen dollars on a non-contact voltage tester.  It’ll be the best buy of your life if you are an avid diy enthusiast.  Next turn off the breaker that controls the bathroom electricity.  Go back to the fixture and begin to take it off the wall.  Once the wires are exposed use your voltage tester by waving it near the exposed wires to ensure that the electricity is turned off.  Take a picture of the existing wire combination to help you remember which ones attached to what.  Once you have the electricity turned off and you have tested the wires to ensure that it is off disconnecting everything should be a breeze.  Connect the new fixture in the same way that the old one was connected and you will be ready to go.
5)      Paint that bathroom!!!  This is best way to change your bathroom into a place that you will enjoy spending time in.  Look online for complimentary colors that you like and go hog wild.  Painting a bathroom is pretty easy just make sure you tape off the mirror and the fixtures and spread plastic over anything you don’t want to get paint on and you are good to go.  Also remember that paint scrapes off of most hard non-porous surfaces like a mirror or a chrome faucet with ease.
So if any of these ideas sound like they are right up your alley get to your local hardware store today and start looking at your options.  Half the fun is choos  Once you have your new sink or faucet don’t forget to check out You Tube for detailed instructional videos on installing pedestal sinks and faucets.
ing what you want to do and what styles you are going to choose.
If you decide that you do not have the time or skill set necessary then Check out Use My Guy Services.  We are the valleys trusted source for all your handyman needs.  If you need a reference than check us out on Facebook, yelp and Angie’s List.  We are also on the Better Business Bureau with an A+ rating and have recently won the Super Service Award from Angie’s List.  Check out our entire list projects and upgrades that we can take on for your home or business at usemyguyservices.com or call us at (602)316-9187 to speak with one of our friendly and helpful staff members.
Thanks for reading
Use My Guy Services Your Local San Tan Valley Handyman.